JBoss JMX - 해당되는 글 2건
- 2009.01.13 JBoss Queue Monitoring via MBean
- 2009.01.07 JDK 1.5+ JConsole을 이용한 JBoss Monitoring
JBoss 의 JMS서버의 queue를 모니터링하는 JMX Code입니다. jsp파일로 되어 있으며 복사해서 사용하면 됩니다.
아래의 파일이 실행되어 모니터링되려면 $SERVER_HOME/deploy/jboss-messaging.sar/messaging-service.xml 파일의 다음의 attribute를 true로 바꿔야 합니다.
<attribute name="EnableMessageCounters">true</attribute>
그리고 메시지를 샘플링하는 주기를 적절하게 주면 됩니다.
<attribute name="MessageCounterSamplePeriod">5000</attribute>
아래의 파일이 실행되어 모니터링되려면 $SERVER_HOME/deploy/jboss-messaging.sar/messaging-service.xml 파일의 다음의 attribute를 true로 바꿔야 합니다.
<attribute name="EnableMessageCounters">true</attribute>
그리고 메시지를 샘플링하는 주기를 적절하게 주면 됩니다.
<attribute name="MessageCounterSamplePeriod">5000</attribute>
<%@
page language="java" contentType="text/html; charset=UTF-8"
pageEncoding="UTF-8" import="javax.naming.*,
java.util.*,javax.management.*,org.jboss.jms.server.destination.*,org.jboss.jmx.adaptor.rmi.*"%>
<!DOCTYPE html PUBLIC "-//W3C//DTD HTML 4.01 Transitional//EN" "http://www.w3.org/TR/html4/loose.dtd">
<html>
<head>
<meta http-equiv="Content-Type" content="text/html; charset=UTF-8">
<!--meta http-equiv="refresh" content="5"-->
<link href="style.css" rel=stylesheet type="text/css">
<title>Insert title here</title>
</head>
<body leftmargin=15 topmargin=10>
<center><p>
<br>
<table width="600" cellpadding="7" cellspacing="0" border="1" bordercolordark="WHITE" bordercolorlight="BLACK">
<tr bgcolor=#E8EEEC>
<%
String type = "Queue";
Hashtable<String,String> env = new Hashtable<String,String>();
String factory = "org.jboss.security.jndi.JndiLoginInitialContextFactory";
env.put(Context.INITIAL_CONTEXT_FACTORY, factory);
String url = "jnp://127.0.0.1:1099";
env.put(Context.PROVIDER_URL, url);
env.put(Context.SECURITY_CREDENTIALS, "admin");
env.put(Context.SECURITY_PRINCIPAL, "admin");
Context ctx = new InitialContext(env);
RMIAdaptor server = (RMIAdaptor) ctx.lookup("jmx/invoker/RMIAdaptor");
%>
<td align center>Queue Name</td>
<td align center>Total Count</td>
<td align center>Current Count</td>
<td align center>Consumer Count</td>
<td align center>Delivering Count</td>
</tr>
<tr>
<td align center>queue/A</td>
<%
String queueName = "A";
// Get the MBeanInfo for the JNDIView MBean
String targetName = "jboss.messaging.destination:service=" + type + ",name=" + queueName;
ObjectName objName = ObjectName.getInstance(targetName);
QueueMBean queueMBean = (QueueMBean) MBeanServerInvocationHandler.newProxyInstance(server, objName, QueueMBean.class, false);
int totalMessageCount = 0;
int currentMessageCount = 0;
totalMessageCount = queueMBean.getMessageCounter().getCount();
currentMessageCount = queueMBean.getMessageCount();
%>
<td align center><%= totalMessageCount %></td>
<td align center><%= currentMessageCount %></td>
<td align center><%= queueMBean.getConsumerCount() %></td>
<td align center><%= queueMBean.getDeliveringCount() %></td>
</tr>
<tr>
<td align center>queue/B</td>
<%
queueName = "B";
// Get the MBeanInfo for the JNDIView MBean
targetName = "jboss.messaging.destination:service=" + type + ",name=" + queueName;
objName = ObjectName.getInstance(targetName);
queueMBean = (QueueMBean) MBeanServerInvocationHandler.newProxyInstance(server, objName, QueueMBean.class, false);
totalMessageCount = 0;
currentMessageCount = 0;
totalMessageCount = queueMBean.getMessageCounter().getCount();
currentMessageCount = queueMBean.getMessageCount();
%>
<td align center><%= totalMessageCount %></td>
<td align center><%= currentMessageCount %></td>
<td align center><%= queueMBean.getConsumerCount() %></td>
<td align center><%= queueMBean.getDeliveringCount() %></td>
</tr>
</table>
카테고리 - JBoss AS | 2009. 1. 13. 11:13
JDK 1.5이상부터 제공하는 Sun의 JConsole을 사용하면 VM에 대한 정보를 모니터링 할 수 있습니다. 이를 이용하여 또한 JBoss의 구동중인 VM상태를 모니터링 할 수 있습니다. 자세한 정보는 아래의 URL에서 확인하실 수 있습니다.
http://java.sun.com/j2se/1.5.0/docs/guide/management/agent.html
Technical Articles : http://java.sun.com/developer/technicalArticles/J2SE/jconsole.html
1. Local에서 구동중인 JBoss Server에 설정하기
JMX Agent를 Local의 JBoss 서버에 구동시키려면 다음의 java option을 run shell(run.conf/run.sh or run.bat)에 포함시켜 주시면 됩니다.

2. Remote Server에서 구동중인 JBoss Server에 설정하기
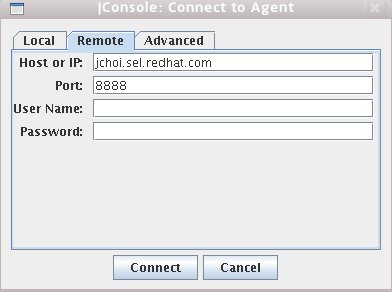
Remote라고 해서 별다른 설정이 있는 게 아닙니다. 원격에서 실행하는 JBoss Server의 옵션에 필요한 파라미터를 전달받아 JConsole을 로컬에서 실행해서 보면 됩니다.
기본적으로는 다음의 스크립트를 추가하도록 합니다.

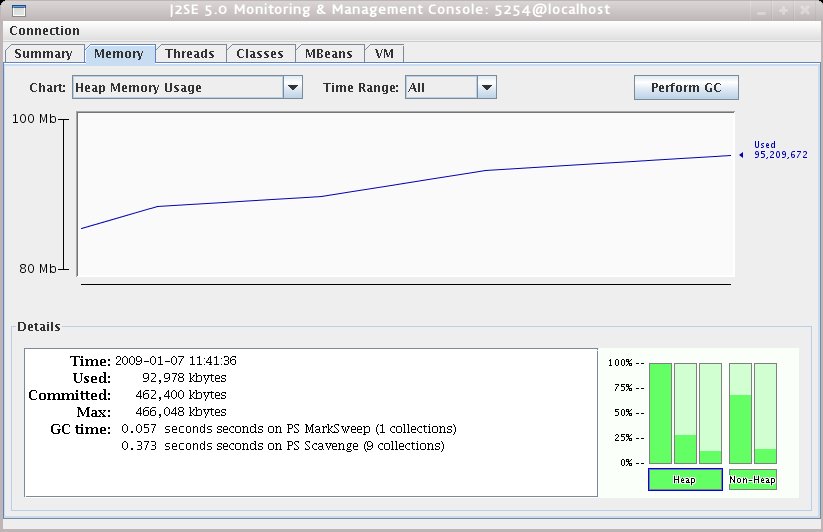
위의 설정을 이용하여 추이를 지켜본 후 Memory Leak등의 여부를 그래프로 확인해볼 수 있을 겁니다.
http://java.sun.com/j2se/1.5.0/docs/guide/management/agent.html
Technical Articles : http://java.sun.com/developer/technicalArticles/J2SE/jconsole.html
1. Local에서 구동중인 JBoss Server에 설정하기
JMX Agent를 Local의 JBoss 서버에 구동시키려면 다음의 java option을 run shell(run.conf/run.sh or run.bat)에 포함시켜 주시면 됩니다.
연결이 되면 아래의 그림처럼 VM 상황에 대한 자세한 정보를 확인할 수 있습니다.#
# Specify options to pass to the Java VM.
#
if [ "x$JAVA_OPTS" = "x" ]; then
JAVA_OPTS="-server -Xms128m -Xmx128m"
fi
# Enable the jconsole agent locally
JAVA_OPTS="$JAVA_OPTS -Dcom.sun.management.jmxremote"
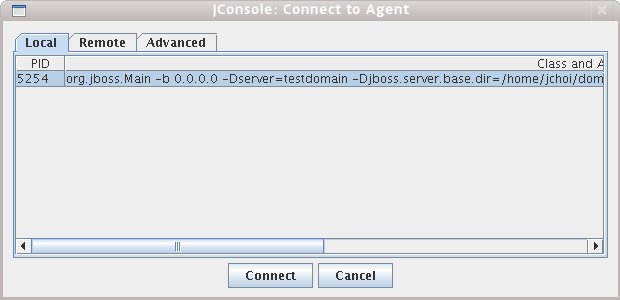
그런 다음 $JAVA_HOME/bin/jconsole을 실행시키면 다음의 화면이 나타납니다.
[jchoi@/opt/java1.5]jconsole

2. Remote Server에서 구동중인 JBoss Server에 설정하기
Remote라고 해서 별다른 설정이 있는 게 아닙니다. 원격에서 실행하는 JBoss Server의 옵션에 필요한 파라미터를 전달받아 JConsole을 로컬에서 실행해서 보면 됩니다.
기본적으로는 다음의 스크립트를 추가하도록 합니다.
#

# Specify options to pass to the Java VM.

#

if [ "x$JAVA_OPTS" = "x" ]; then

   JAVA_OPTS="-server -Xms128m -Xmx128m"

fi

# Enable the jconsole agent remotely on port 12345

JAVA_OPTS="$JAVA_OPTS -Dcom.sun.management.jmxremote.port=12345"
# Enable the jconsole agent remotely on port 8888

JAVA_OPTS="$JAVA_OPTS -Dcom.sun.management.jmxremote.port=8888"

JAVA_OPTS="$JAVA_OPTS -Dcom.sun.management.jmxremote.authenticate=false"

JAVA_OPTS="$JAVA_OPTS -Dcom.sun.management.jmxremote.ssl=false"

위의 설정을 이용하여 추이를 지켜본 후 Memory Leak등의 여부를 그래프로 확인해볼 수 있을 겁니다.
카테고리 - JBoss AS | 2009. 1. 7. 11:50


